API Admin Interface/en
Aus EUserv Wiki
(→Setting up the API Administration) |
(→General) |
||
| Zeile 7: | Zeile 7: | ||
</div> | </div> | ||
== General== | == General== | ||
| - | If you have an EUserv server or domain, you have the | + | If you have an EUserv server or domain, you have the possibility to set up in customer service center as well as the EUserv API. |
| - | The API is similar to a remote control, which independently | + | The API is similar to a remote control, which independently set from EUserv customer center. To be able to undertake the setting of second person, without disclosing your entire customer service center. This is an advantage particularly for Reseller, because their customers can make your settings independent. |
This guide we have created for you in the "API Sandbox". The sandbox is a testing environment and is analogous to the "Live API" to use. We recommend you first attempts and settings perform a test basis in the sandbox because your live system is not affected, but even if incorrect settings are made. | This guide we have created for you in the "API Sandbox". The sandbox is a testing environment and is analogous to the "Live API" to use. We recommend you first attempts and settings perform a test basis in the sandbox because your live system is not affected, but even if incorrect settings are made. | ||
Version vom 08:29, 8. Okt. 2012
| | Languages: |
Deutsch |
API Administration
Inhaltsverzeichnis |
API Administration
General
If you have an EUserv server or domain, you have the possibility to set up in customer service center as well as the EUserv API.
The API is similar to a remote control, which independently set from EUserv customer center. To be able to undertake the setting of second person, without disclosing your entire customer service center. This is an advantage particularly for Reseller, because their customers can make your settings independent.
This guide we have created for you in the "API Sandbox". The sandbox is a testing environment and is analogous to the "Live API" to use. We recommend you first attempts and settings perform a test basis in the sandbox because your live system is not affected, but even if incorrect settings are made.
Setting up the API Administration
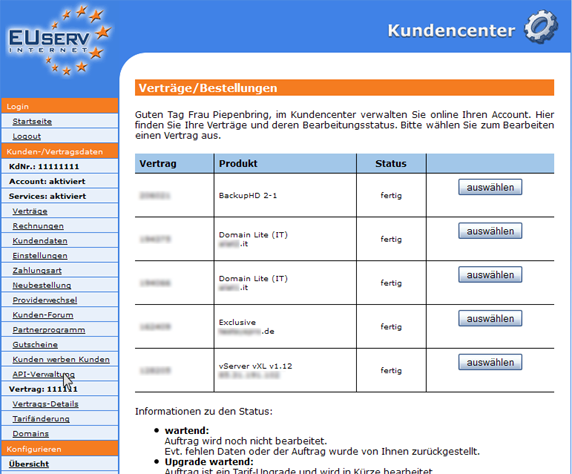
In EUserv customer center, you have the option of making settings for your API Administration. Choose "API-Verwaltung" in the main menu on the left.
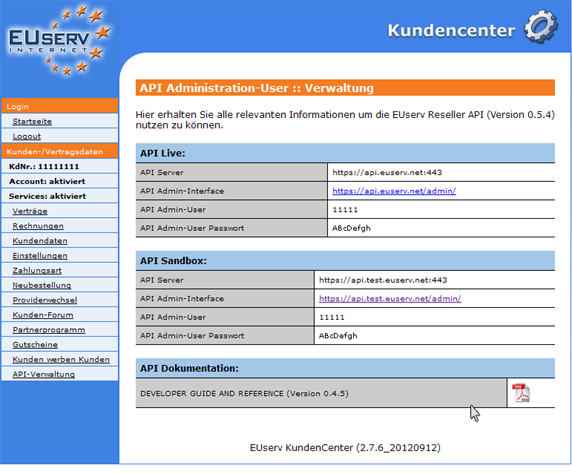
Now you can choose between "API Live", "API Sandbox" and "API Dokumentation".
All the settings you make in "API Live" will be immediately implemented and "scharf" are switched.
Setting the API
To use the API, you can click on the link in the customer service center (https://api.test.euserv.net/admin/) behind "API admin interface."
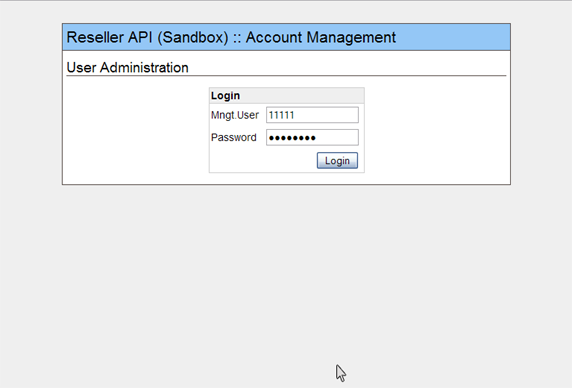
You are then directed to the login page of the API.
On this log in, provided in the customer service center with the user's data.
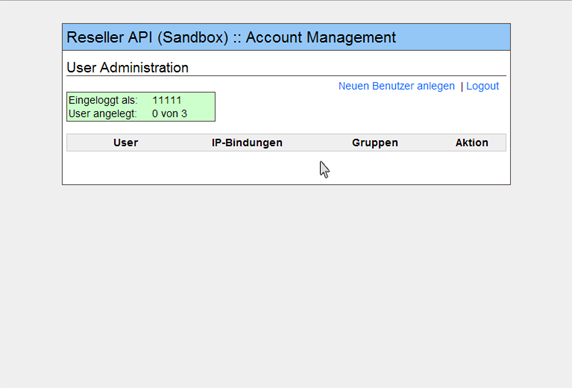
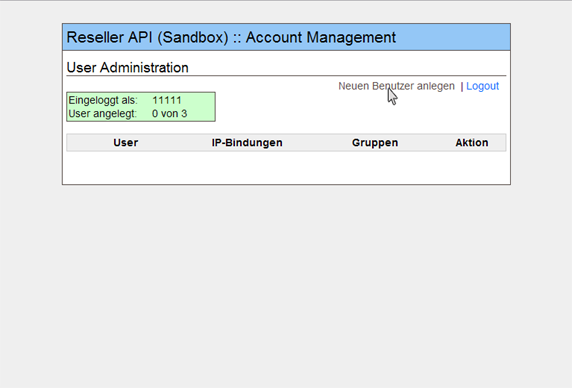
On the overview page you get the API user profiles.
Creating the User API
By clicking "Neuen Benutzer Anlegen" you have the option to create a new user for your API.
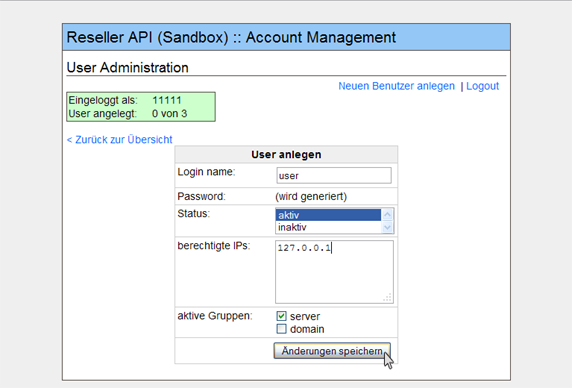
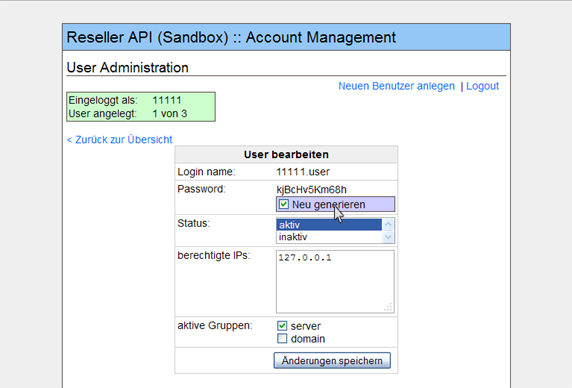
Now you need to define your user. As "Login name" the user name is called. Enter a name, that allows you to assign to the user clearly. A secure password will be generated automatically. Under "Status" you determine whether the user is active or inactive, ie whether the user profile can be used or not. If you switch the user to inactive and save the settings to take effect, however, the user's profile cannot be used yet.
In "berechtigte IPs" will define the IP addresses that are authorized to access this user profile. If the user has a fixed IP address, then enter it there for example: 127.0.0.1.
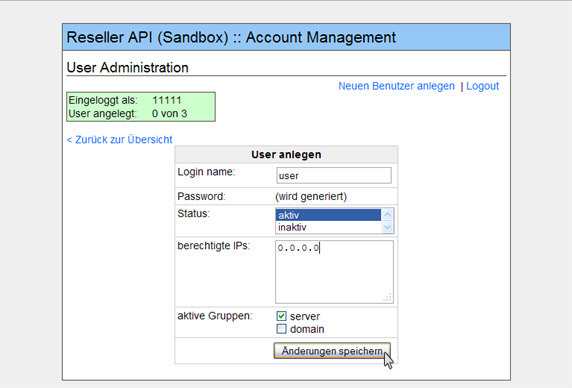
If your user has no fixed IP address, enter the wildcard "0.0.0.0". Please note that all IP addresses can access with username and password on your API - it's safer if you can define a fixed IP address.
Put another check in the "Domain" or "Server", depending on which tariff is to act for your API.
Click "Änderungen speichern" to apply the settings.
Editing the User API
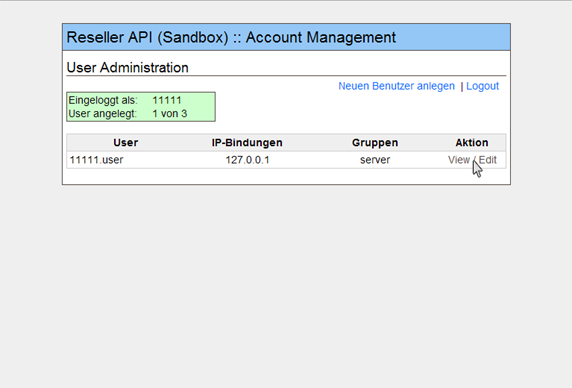
If you have already created a user of your API and want to edit it, then click back to the appropriate user profile on "View/Edit".
You can now let the user profile to generate a new password to change the status that define authorized IP address or assign a group. Click "Änderungen speichern" to save the changes.

