Manual Installation FreeNAS/en
Aus EUserv Wiki
Root (Diskussion | Beiträge) (→First configuration) |
Root (Diskussion | Beiträge) (→Funktionen) |
||
| Zeile 73: | Zeile 73: | ||
Green light! The password has been successfully changed. Now the alert flashes green. | Green light! The password has been successfully changed. Now the alert flashes green. | ||
| - | = | + | = Functions = |
---- | ---- | ||
| - | == | + | == Add mass storages == |
<center> | <center> | ||
[[Datei:screenshot10.png|thumb|620px]] | [[Datei:screenshot10.png|thumb|620px]] | ||
</center> | </center> | ||
| - | + | To add mass storages is very comfortable with FreeNAS: Simply click on ''Storage'' and then on ''Create Volume''. | |
| - | + | If the system identifies other volumes except the installation volume, they will be shown here. | |
<center> | <center> | ||
| Zeile 87: | Zeile 87: | ||
</center> | </center> | ||
| - | + | By selection of more than one volume, the system offers to set up a RAID. | |
| + | Here a new volume would be mounted under ''/mnt/<volume>'' and can be immediately used. If two volumes were mounted, a mirror and a stripe will be created. | ||
<center> | <center> | ||
| Zeile 93: | Zeile 94: | ||
</center> | </center> | ||
| - | + | The raid has been created. The creating of a raid is to be done in less than two minutes. | |
<center> | <center> | ||
| Zeile 99: | Zeile 100: | ||
</center> | </center> | ||
| - | + | If you create a ''ZFS-Volume'', you can create timed snapshots of the volume. | |
| - | == | + | == Services, users, groups and sharing == |
<center> | <center> | ||
| Zeile 107: | Zeile 108: | ||
</center> | </center> | ||
| - | + | Under the function ''Services --> Services'' you can define, which services the system should provides for you. All services are deactivated by default. If you click on the switch these can be activated. The available services are AFP, Active Directory, CIFS, DNS, FTP, LDAP, NFS, SNMP, TFTP und iSCSI. | |
| - | + | ||
<center> | <center> | ||
| Zeile 117: | Zeile 117: | ||
</center> | </center> | ||
| - | + | You can define different users and groups. Under ''Account --> Users/Groups'' you can define access rights. | |
<center> | <center> | ||
| Zeile 123: | Zeile 123: | ||
</center> | </center> | ||
| - | + | Under the function ''Sharing'' you can find three areas: ''Apple, UNIX'' and ''Windows''. It is clear which shares have which effect. | |
| - | + | == System and reportings == | |
| - | == System | + | |
<center> | <center> | ||
| Zeile 131: | Zeile 130: | ||
</center> | </center> | ||
| - | + | Under the function ''System'' you can find useful information about the utilization of the NAS. Over ''System --> Reporting'' administrators can also send reports by mail. | |
<center> | <center> | ||
| Zeile 137: | Zeile 136: | ||
</center> | </center> | ||
| - | + | You also have the possibility to save the configuration of the system. Through ''Rsync'' this is a practical issue if FreeNAS hast to be reinstalled or moved. | |
| + | You can comfortably install the old settings later. Under ''Rsync Tasks --> Add Rsync Task'' you can create a new Rsync task. | ||
<center> | <center> | ||
| Zeile 143: | Zeile 143: | ||
</center> | </center> | ||
| - | + | Under S.M.A.R.T. Tests you can check your hard drives on errors. This service has to be activated. Under ''S.M.A.R.T. Tests --> Add S.M.A.R.T. Test'' you can create a new S.M.A.R.T. test. | |
Version vom 07:49, 17. Sep. 2012
| | Languages: |
Deutsch |
Installation and configuration of FreeNAS
Inhaltsverzeichnis |
Installation and configuration of FreeNAS
General
FreeNAS is a free operation system for Network Attached Storage.
It runs on x86-compatible platforms and is based on FreeBSD.
The latest version FreeNAS 8.x is a minimal version of FreeBSD 8.2 and requires about 64 MB free memory. FreeNAS is bootable from a compact flash card, USB stick or hard drive.
The management over the network is handled through a comfortable web interface.
Installation
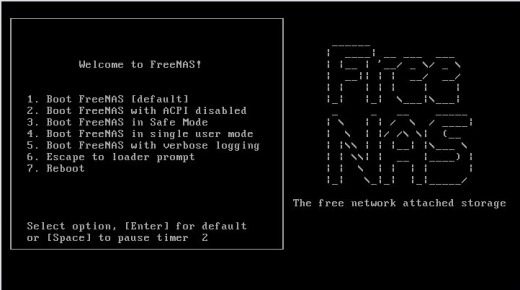
FreeNAS can be downloaded as an image from sourceforge.net and mounted. The start screen of FreeNAS provides different options for the starting. Boot FreeNAS [default] is the default starting.
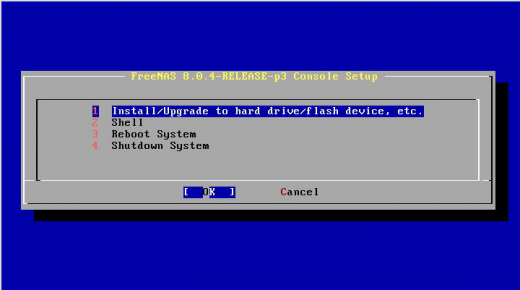
The installation wizard helps you with the instalation of the operation system.
Confirm with Ok.
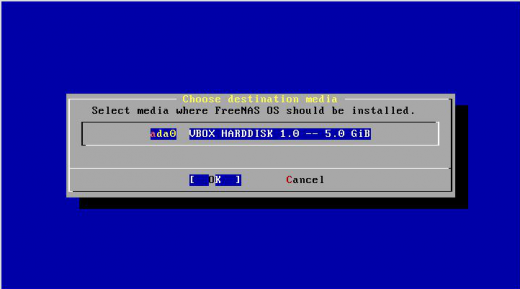
Choose the volume on which you want to install FreeNAS.
Confirm with Ok.
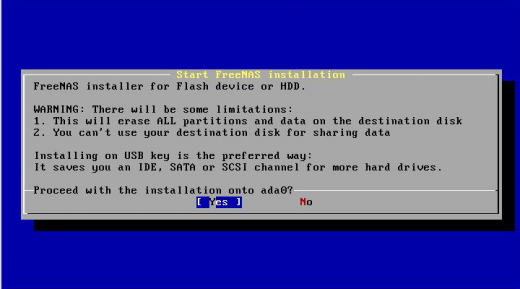
The installation can be started. FreeNas will be installed on the selected volume.
Confrim with Yes.
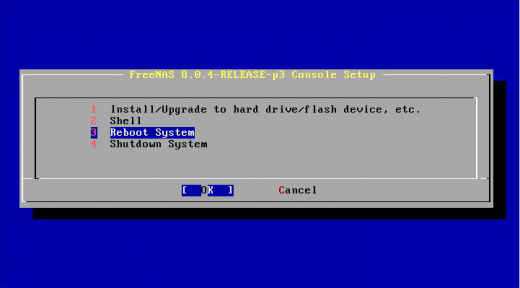
A reboot of the operation system is required.
Choose Reboot System and confrim with Ok.
First configuration
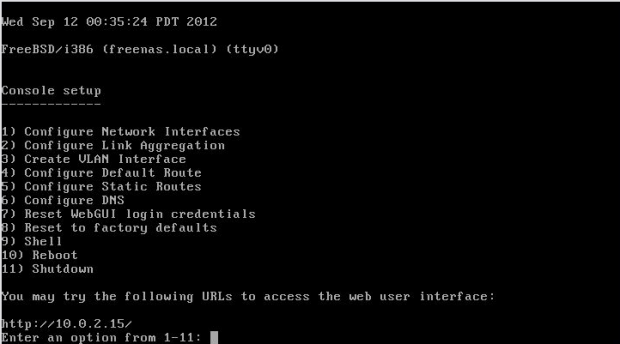
To achieve FreeNAS, you should give the system a network address, if no address has been assigned through DHCP.
If an url has been assigned, you find this under the line:
You may try the following URLs to access the web user interface:
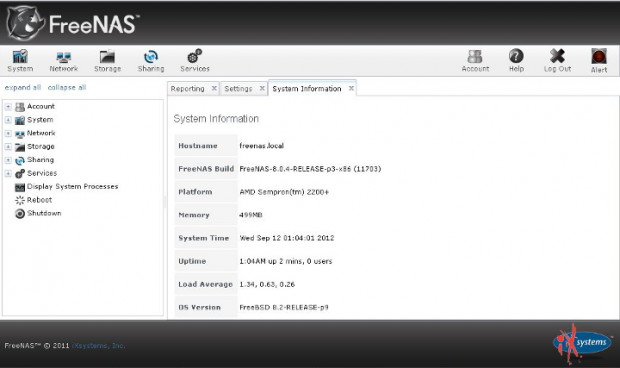
Now you can call over your assigned ip address the web interface with you browser.
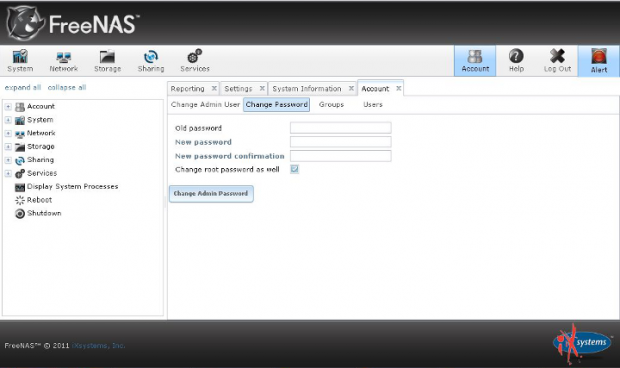
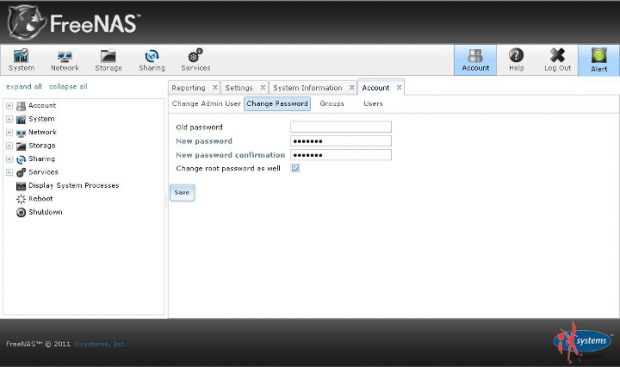
Please change immediately your password. The alert light flashes red and refers you to set a password. You can do this over Account → Change Password.
Green light! The password has been successfully changed. Now the alert flashes green.
Functions
Add mass storages
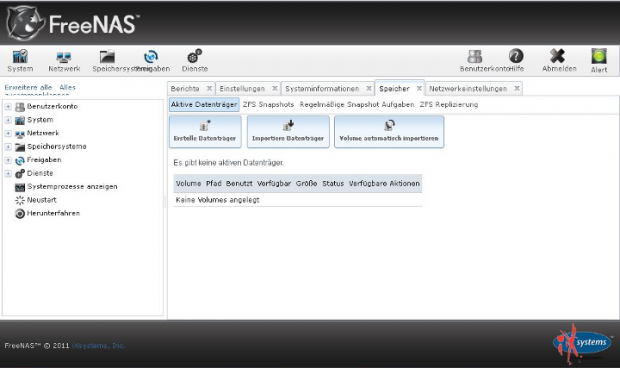
To add mass storages is very comfortable with FreeNAS: Simply click on Storage and then on Create Volume. If the system identifies other volumes except the installation volume, they will be shown here.
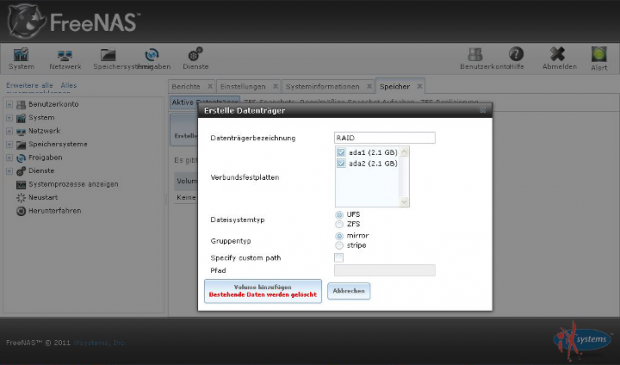
By selection of more than one volume, the system offers to set up a RAID. Here a new volume would be mounted under /mnt/<volume> and can be immediately used. If two volumes were mounted, a mirror and a stripe will be created.
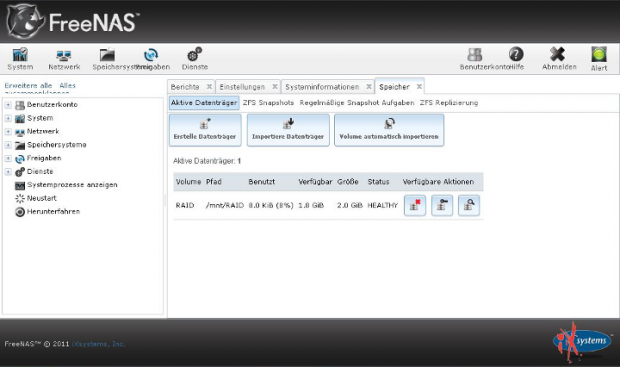
The raid has been created. The creating of a raid is to be done in less than two minutes.
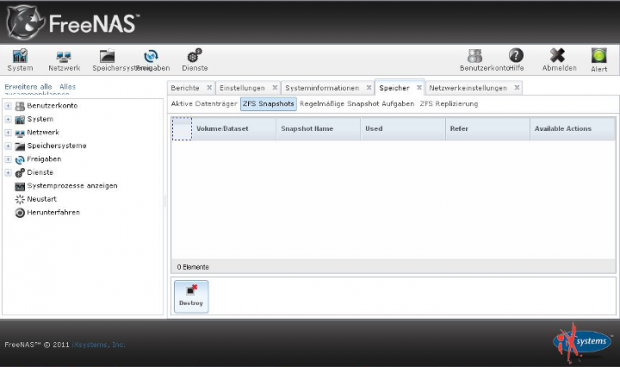
If you create a ZFS-Volume, you can create timed snapshots of the volume.
Services, users, groups and sharing
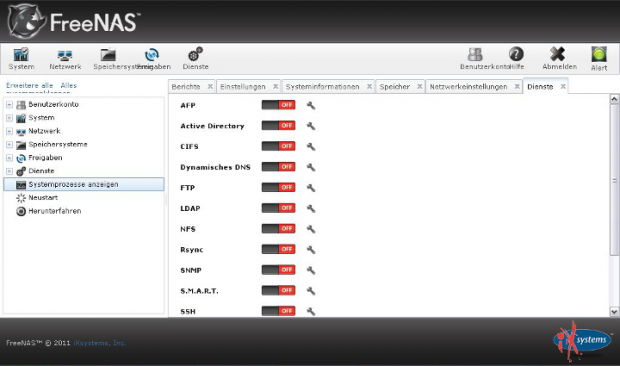
Under the function Services --> Services you can define, which services the system should provides for you. All services are deactivated by default. If you click on the switch these can be activated. The available services are AFP, Active Directory, CIFS, DNS, FTP, LDAP, NFS, SNMP, TFTP und iSCSI.
You can define different users and groups. Under Account --> Users/Groups you can define access rights.
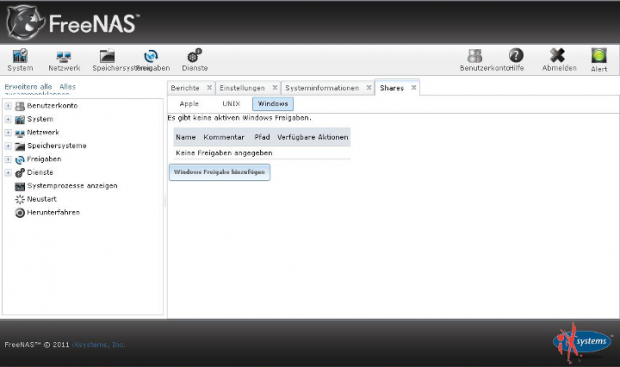
Under the function Sharing you can find three areas: Apple, UNIX and Windows. It is clear which shares have which effect.
System and reportings
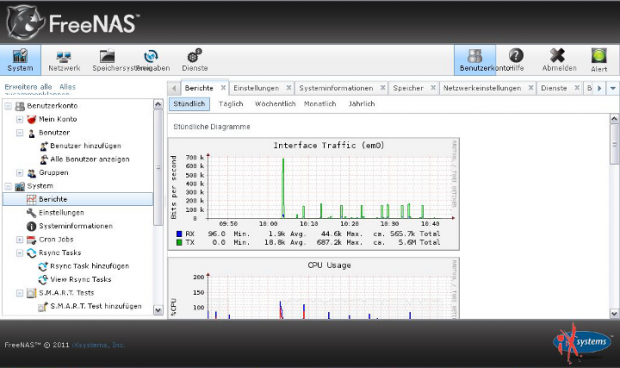
Under the function System you can find useful information about the utilization of the NAS. Over System --> Reporting administrators can also send reports by mail.
You also have the possibility to save the configuration of the system. Through Rsync this is a practical issue if FreeNAS hast to be reinstalled or moved. You can comfortably install the old settings later. Under Rsync Tasks --> Add Rsync Task you can create a new Rsync task.
Under S.M.A.R.T. Tests you can check your hard drives on errors. This service has to be activated. Under S.M.A.R.T. Tests --> Add S.M.A.R.T. Test you can create a new S.M.A.R.T. test.

