Manual VNC-Installation CentOS 6.3/en
Aus EUserv Wiki
| | Languages: |
Deutsch |
Manual VNC-Installation CentOS 6.3
Inhaltsverzeichnis |
Manual VNC-Installation CentOS 6.3
General
EUserv provides the comfortable VNC installation for the operating system CentOS 6.3. With this you are able to install CentOS using a graphical install wizard and adjust the installation to your liking. You will need a VNC viewer for the installation. Windows users can try UltraVNC or RealVNC for this purpose. Linux users can use Vinagre or TightVNC for instance.
Preparing the installation
To activate the VNC installation for CentOS 6.3 proceed as follows:
- Log in to the EUserv customer center.
- Choose your server contract and click Re-Installation from the left menu.
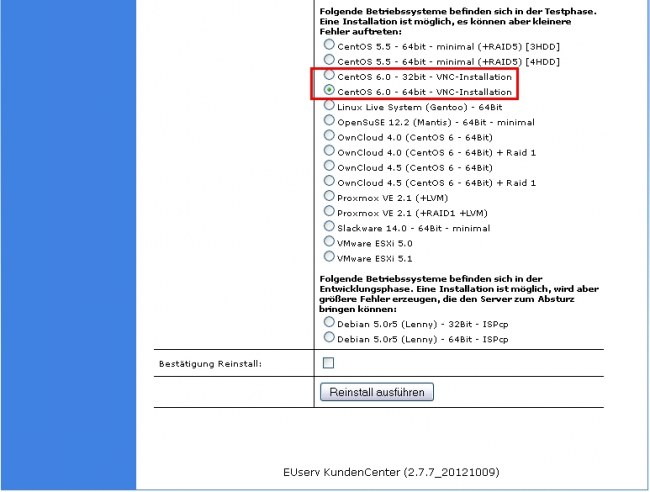
- Select the appropriate OS from the list (32 or 64 bit) and click Reinstall ausführen (executing installation) from below. Make sure to set the tick at Bestätigung Reinstall (confirming the installation). The Re-installation is now being processed:
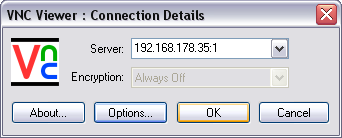
- After approximately 15 minutes you can connect with the server using a VNC viewer. Under Server enter your server's IP. You can find it in the customer center under Serverdaten. The required port is 5901. It doesn't matter whether you enter :5901 or :1. The only thing important is the colon between the IP and the port. In this example we are using the RealVNC viewer and confirm our input by clicking OK:
You now will be prompted to enter your server password for authentication. This is the default password you can find in the customer center under Serverdaten. Also confirm the input with OK:
You should now be connected with the server and see the following screen:
The installation
You are now able to navigate through the installation by using your mouse and keyboard. The installation process consists of the following:
- Choosing the hard disk type: the default setting is Basic Storage Devices
- The installation type: Choose Fresh Installation here
- Setting the hostname and time zone
- Setting the root password - it has to consist of 6 characters at least
- Determinating the partitioning scheme. The default setting is Use all Space causing the installer to partition all disk space available.
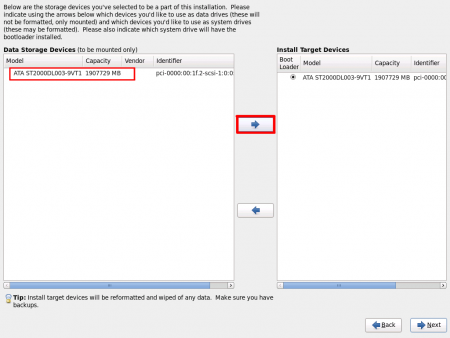
In the next step you will be prompted to state the hard disk(s) that are supposed to be used for the installation. Choose the hard disk(s) here and assign it to the installation by clicking the arrow pointing to the right. Confirm everything by clicking Next:
Now select the kind of installation. Available are (among others) Desktop (installation with GUI), Minimal (without GUI) and Web Server (containing the apache-Webserver). Confirm your decision by clicking Next.
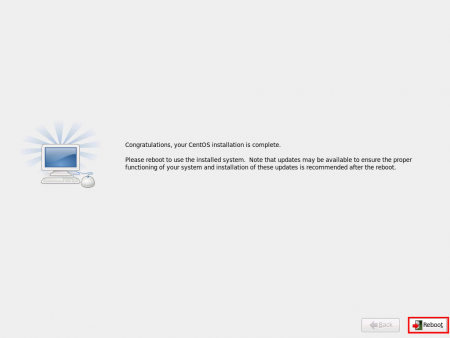
The system will now be installed. When the operation has completed successfully click Reboot in the next screen:
CentOS has been installed on your server. After rebooting you can connect with your server by using SSH for instance:
ssh root@<YourServerIP>
More hints and information about the basic administration of your server can be found at the EUserv wiki using the following link: https://www.euserv.com/wiki/index.php/Grundlegende_Serveradministration/en

