Web.storage.euserv.net/en
Aus EUserv Wiki
| | Languages: |
Deutsch |
Using the Storage Web-Client
Inhaltsverzeichnis |
Using the Storage Web-Client
General
If you have an EUserv BackupHD, there is a possibility to comprehensively establish it in the customer service center.
Also, you have the ability to manage your BackupHD on our EUserv Storage Web client. All you need is a FTP backup account and a current web browser. How to create a FTP backup account,can be find here
Starting the Storage Web-Client
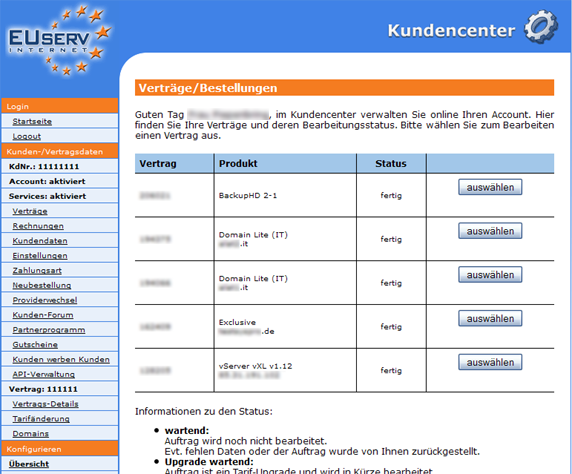
Choose your BackupHD contract for which you want to start the EUserv Storage Web client.
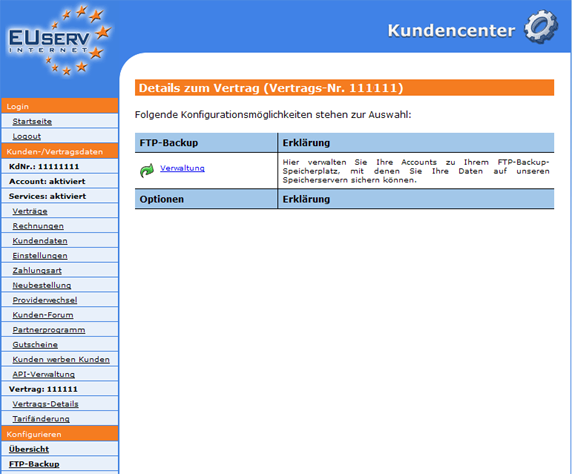
Once you have selected your BackupHD contract, now click on "Verwaltung" under FTP-Backup.
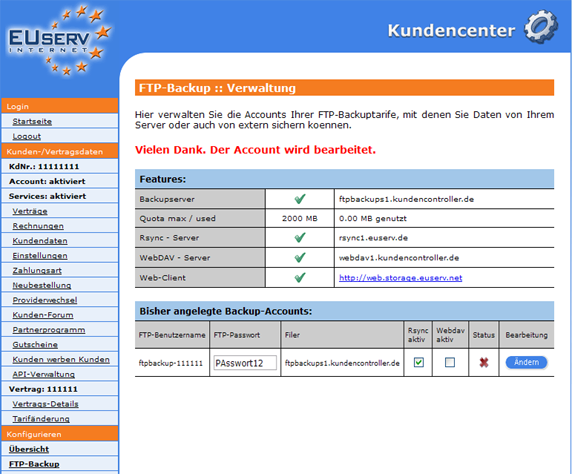
Here you can start for your BackupHD the EUserv Storage Web client.
The overview "Verwaltung" to itemize you on how many available tariff you have in your storage space. How much is already used and the general information that you need to use your BackupHD.
To start the Storage EUserv Web client, click on the link in the customer or give your browser. https://support.euserv.de/web-storage/
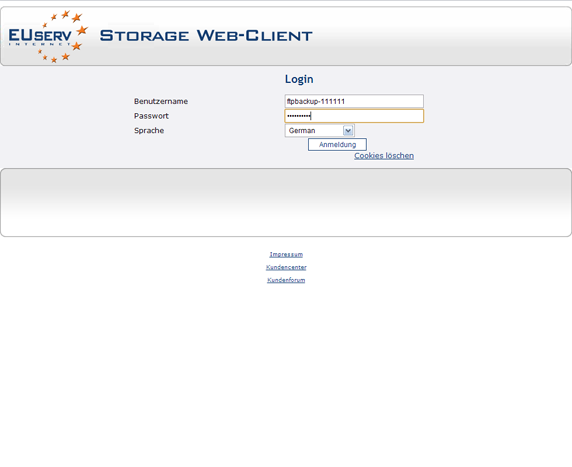
To log on to EUserv Storage Web client, you will need your FTP username and FTP password.
Using the Storage Web-Client
Login with your FTP user data.
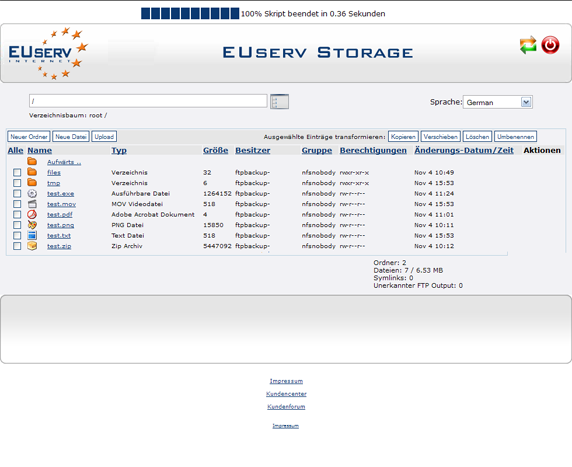
After log in you will automatically get on the overview page. You will see the entire contents of your BackupHD clearly represented.
Creating a Folder
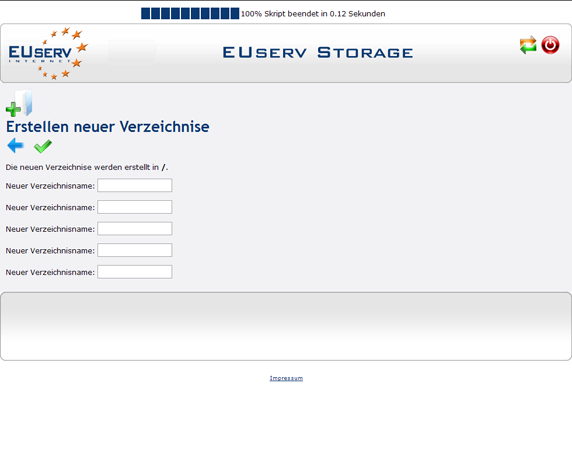
In this overview page you have different policy options to choose. Click on "Neuer Ordner" to create a new folder in your current directory.
You can create on the 'Erstellen neuer Verzeichnisse' up to 5 folders in a single operation. Click on the "blauen Pfeil" to return back to main. This operations always confirms by clicking on the 'grünen Haken', right next to the blue arrow.
Creating a Files
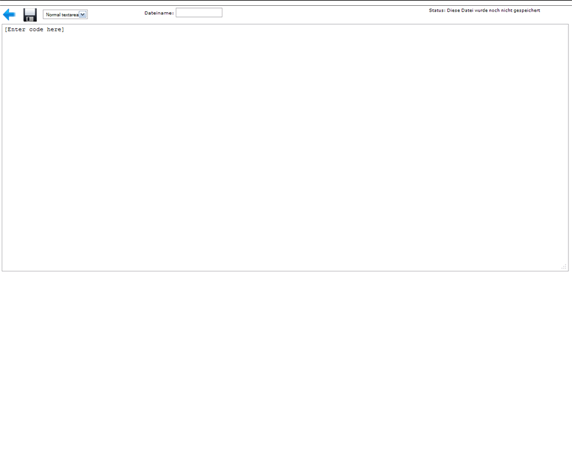
By clicking on "Neue Datei", it is possible to create directly from the Storage EUserv Web client files just like in the editor and save it to your directory.
To save your newly created file, click on the "Diskette" above left. Click on the "blauen Pfeil" to return back to main.
Uploading Files
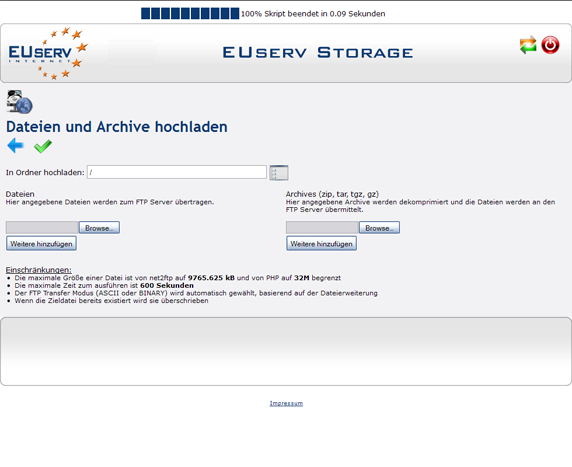
For uploading new files to your directory, just click "Upload".
By clicking on "Browse" to browse your local PC for the desired file. You can add simply to upload the other files by clicking on "Weitere hinzufügen". By specifying the destination directory, use the field "In Ordner hochladen" where your files should be stored.
Manage the Files
You can manage the files that reside on your online hard disk, like in the different local system e.g., "Kopieren", "Verschieben", "Löschen" oder "Umbenennen". To use this options to one or more files, you must select the "Checkboxen" before selecting the file name.
Move
By "Verschieben" of files, you can rename the same individual by specifying in "Ziel Name" another/new name. You can also end up with a click of the corresponding destination folder for all the selected files with the option to determine the "Setzen als Zielordner für alle".
Delete
To delete a file, select it by "Checkbox" before the file name and then select the option "Löschen". It will take you again to the confirmation page by clicking on the "grünen Haken" to your choice.
Complete the Storage Web-Client
If you have finished your work on your online hard disk, you can log in by clicking on the 'Off-Button'. Logging off is very important for the security of your data, particularly if you have logged from public PC's (e.g., Internet café, library etc).

