WebDAV Zugang für BackupHD/en
Aus EUserv Wiki
| | Languages: |
Deutsch |
WebDAV access for my BackupHD
Inhaltsverzeichnis |
WebDAV access for my BackupHD
General
In order to use WebDAV for your BackupHD you will have to enable the function in the customer center. To do that select your contract, navigate to the men point "Verwaltung" and make the tick at "Webdav aktiv". After that click "Ändern". Your BackupHD will be activated for WebDAV within 24 hours.
Guide for Windows XP
Please note that ServicePack 2 is required at least.
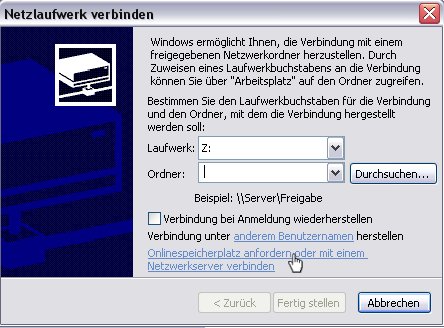
Open "My Computer" (Start -> "My Computer") and select "Tools -> Map Network Drive":
In the following dialogue click "Sign up for online storage or connect to a network server":
Click "Next" in the following dialogue.
Select "Choose another network location" and click "Next"
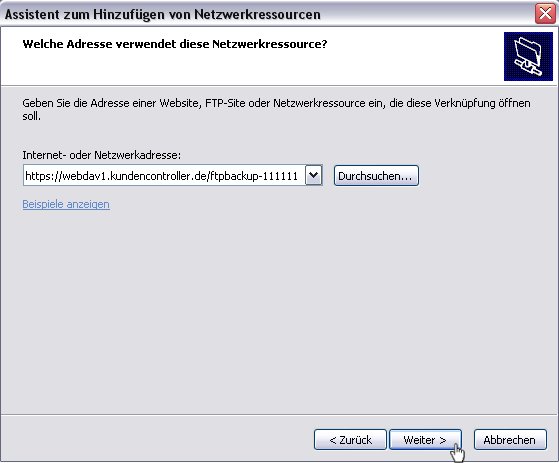
As "Internet or network address" enter the address of the WebDAV access according to the following pattern:
https://<webdavserver>/<FTP-username>/
=> This information can be found in the customer center under "Verwaltung"
e.g. https://webdav1.kundencontroller.de/ftpbackup-11111/
=> In case you are receiving a message saying the folder is "invalid", this is due to WindowsXP. Conduct all updates and install the latest Service Pack and try again.
Click "Next".
Enter your FTP username and password into the following dialogue field and click OK:
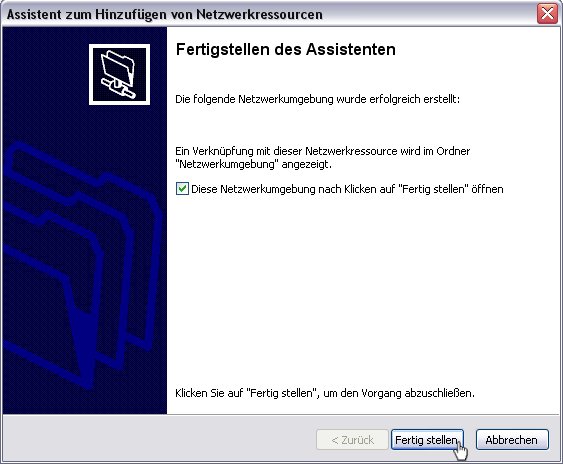
Now name the shared folder with a desired label/name and click "Next". Click "Finish" finally.
Now you will find the folder under "My Network Places" and can use it from here. Windows XP does not allow assigning a drive letter to the WebDAV share. Also opening files is not possible. The files have to be copied locally first. That's a restriction of WindowsXP. Starting from Windows Vista this restriction isn't existent anymore.
Guide for Windows Vista / Windows 7
To set up the WebDAV access under Windows Vista / Windows 7 please proceed as follows:
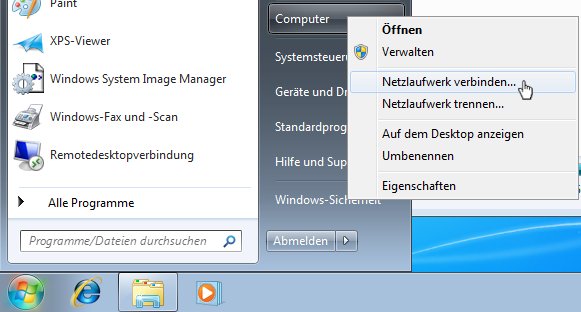
Open the start menu and right-click on "Computer" or "Network". The menu command "Map Network Drive" will appear in the context menu.
You will see a dialogue where you have to enter the address of the WebDAV server.
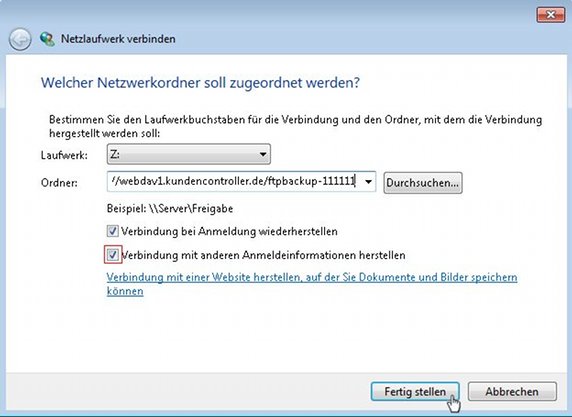
Select a vacant drive letter and enter the WebDAV address in the "Folder" field, according to the following pattern:
https://<webdavserver>/<FTP-username>/
=> This information can be found in the customer center under "Verwaltung"
e.g. https://webdav1.kundencontroller.de/ftpbackup-11111/
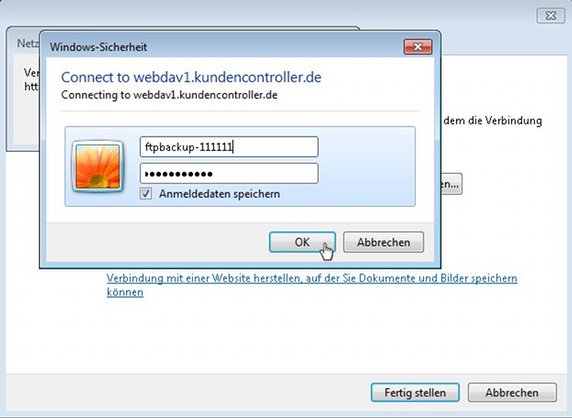
Click "Connect using a different user name" and enter the FTP username and FTP password from the customer center as user name and password respectively. Finally click "Finish".
Enter the access data once again.
Now your BackupHD should be visible as a drive in the Windows Explorer.
Troubleshooting performance problems under Windows 7
Under Windows 7 performance issue may occur when using WebDAV (slow directory listing, timeouts etc.) The following can be done to fix the isse:
- Start Internet Explorer
- Click "Tools" --> "Internet Options"
- Click the "Connections" tab followed by "LAN Settings"
- De-select "Automatically detect settings"
- Finally Click "OK"
Guide for Linux
In order to mount the BackupHD/Online storage with WebDAV under Linux you will need the package davfs2. This is available for all big Linux distributions. The mounting process can be done in an interactive and a non-interactive way.
Interactive mounting
You can mount the BackupHD/Online storage with the following command:
mount.davfs https://webdav1.kundencontroller.de/<User name> <Mounting point>
After execution of the command you will be prompted to enter your user name and password.
Non-interaktive mounting
In case you don't want to enter your credentials every time you mount the BackupHD, you can place them in the file /etc/davfs2/secrets. Just add the following line to the file:
https://webdav1.kundencontroller.de/<User name>/ <User name> <Password>
Example:
- User name = ftpbackup-123456
- Password = PAssWord
- Mounting point = /mnt
https://webdav1.kundencontroller.de/ftpbackup-123456/ ftpbackup-123456 PAssWord


